

Document Cameras are essential utilities for virtual classrooms. They allow you to project images in real-time and can be used to convey difficult concepts and equations. Document cameras have exceptional zoom and magnification capabilities to capture virtually any physical object. However, getting these cameras to work with services like Meet is a whole different process.
You can get your document camera’s video feed to show up in Meet in two different ways. Let’s take a quick look at them.
The advantage of using this method is that you will still be able to use your webcam to interact with all the attendees of your meeting. However, the downside of this method is the slight lag introduced when presenting video feeds over the internet in real-time. Regardless, you can use the guide below to present your document camera in Meet.
Each document camera comes with OEM software that allows you to manage your video feed alongside a preview. This preview can be presented in Meet to ensure that attendees can view the feed from your document camera as well as your webcam (if you have one attached). To get started, ensure that proper drivers and the OEM utility are installed on your device. Connect the document camera to your system and then launch the OEM utility. Wait for the camera feed to show up. Once it shows up, join a meeting in Google Meet as you normally would.
Once joined in, click on the ‘Present’ icon at the bottom of your screen.
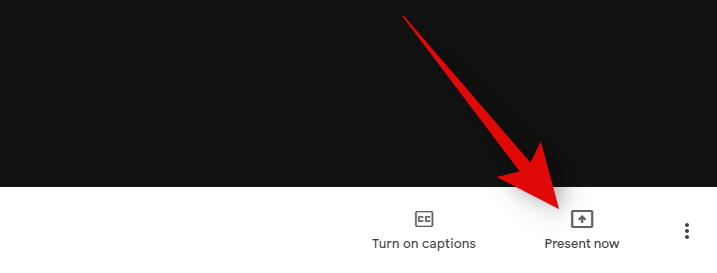
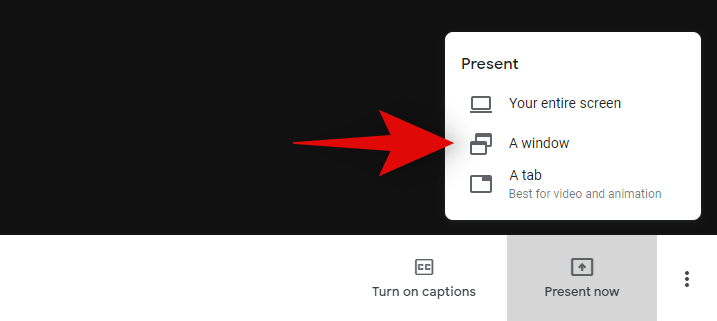
Click on ‘A window’.
Now select the Document Camera utility window as the window you wish to present in Meet.
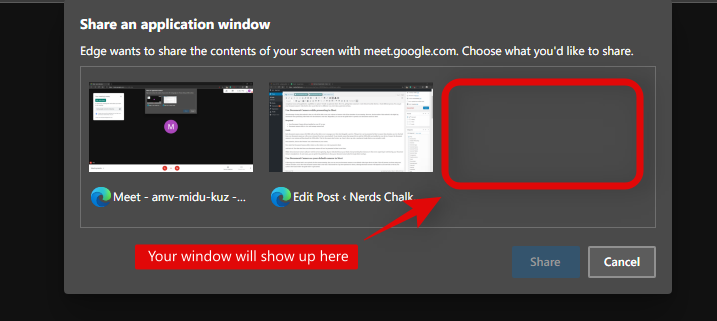
And that’s it! The video feed from your document camera will now be presented in Meet in real-time.
Note: Some document camera software restricts screen capturing. If your video feed shows up as blank when presenting then chances are that screen capturing is restricted by your Document Camera manufacturer. In such cases, you can opt for the guide below to show your document camera feed in Google Meet meetings.
If showing your webcam feed is not a priority for the current meeting, then you can use your document camera as your default video input device in Meet. This will prevent you from using your webcam but allow you to show the document camera feed in real-time. This should be a lag-free experience in theory, although the final outcome will depend on your network as well as your system’s free RAM. Follow the guide below to get started.
Open Google Meet and join a meeting as you normally would. Once joined in, click on the ‘3-dot’ menu icon in the bottom right corner of your screen.
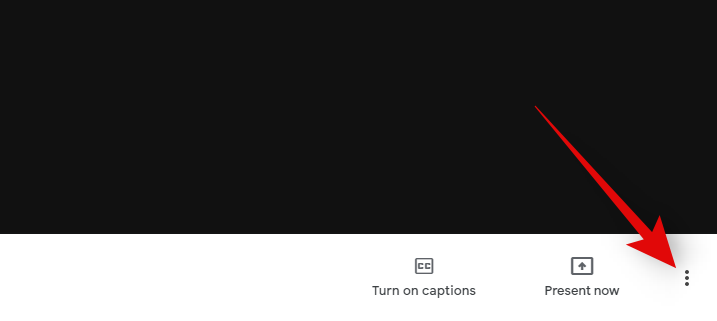
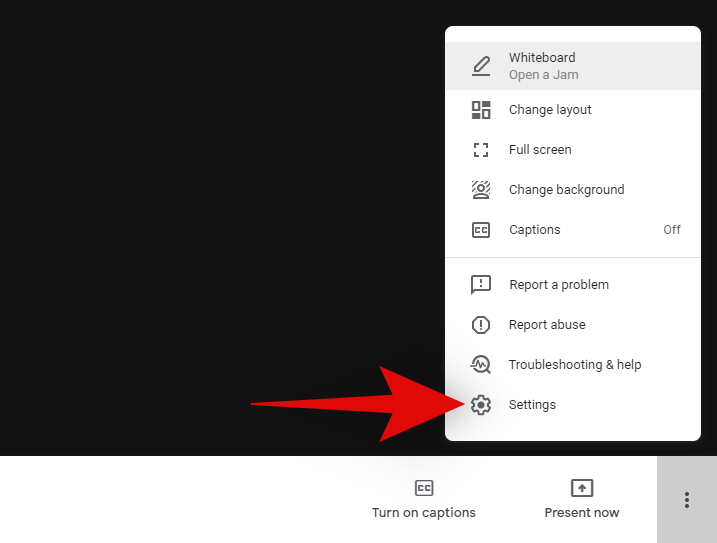
Now click and select ‘Settings’.
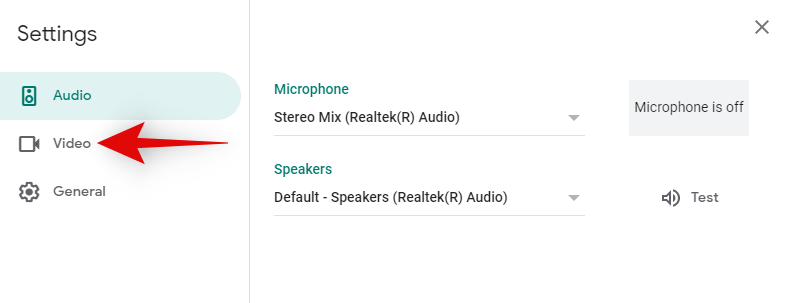
Click on ‘Video’ in the left sidebar of the Settings window.
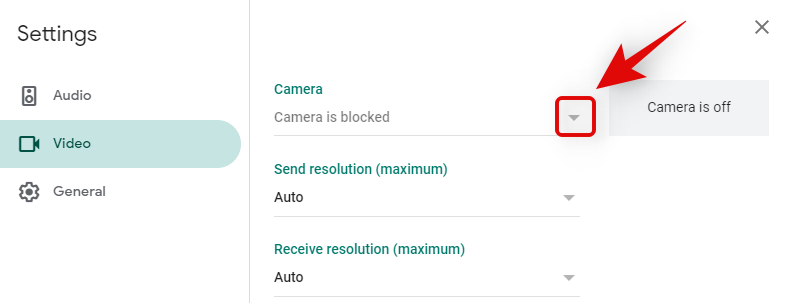
Now click the drop-down menu under ‘Camera’ and select your ‘Document Camera’ from the list.
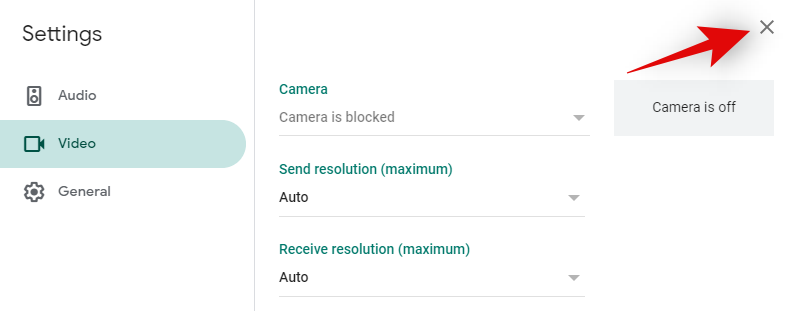
And that’s it! Click on the ‘X’ to close the settings window.
Your document camera feed should now replace your webcam feed and show up as your default video feed in the current meeting. You can now assign yourself as the speaker so that everyone can see your feed properly on their screens.
There are a few things you can do to troubleshoot your document camera feed not showing up.
If all of the above settings ring true, then it might time to get in touch with your manufacturer. This could be a driver mismatch on your system which might need additional troubleshooting, or in the worst cases, you might have to wait for a driver update from your OEM.
We hope this guide helped you easily use your document camera in Google Meet. If you have any more questions for us, feel free to drop them in the comments below.
Related: